

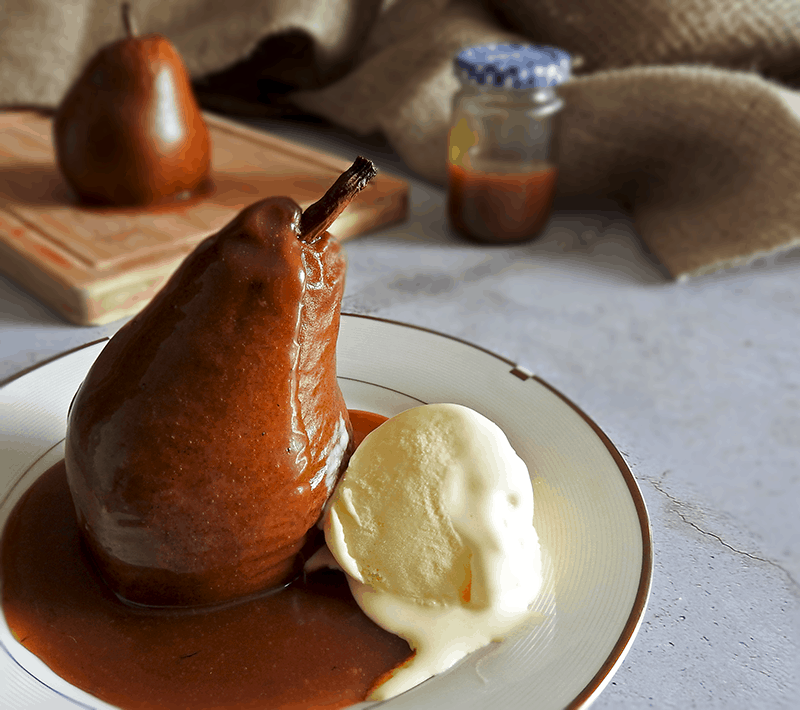
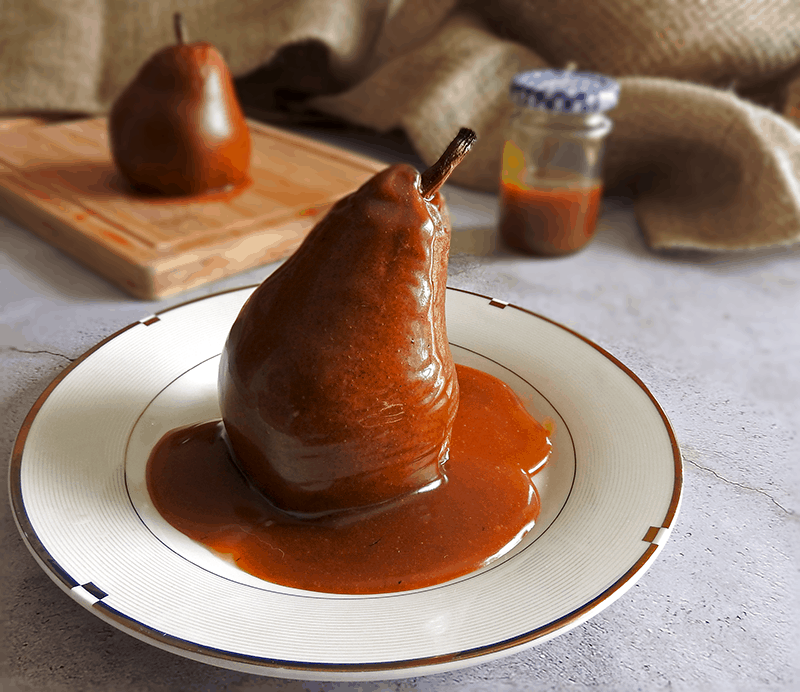
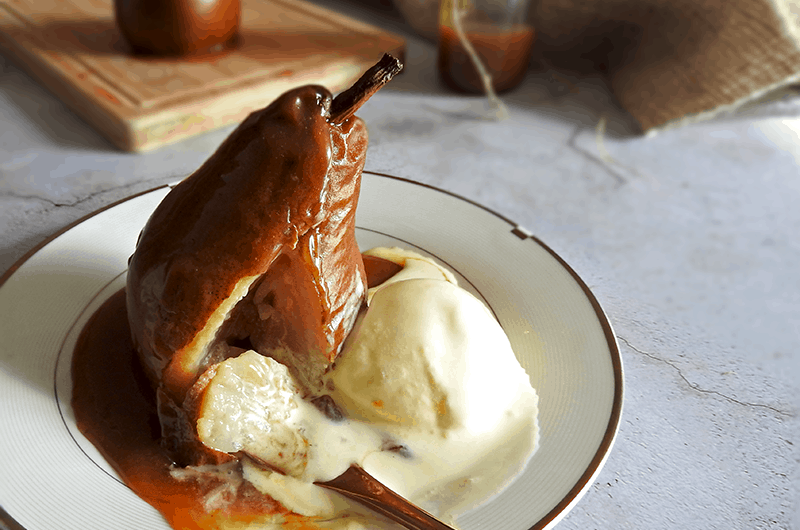
These Salted Caramel Baked Pears are an absolute dream – sweet, soft and covered in beautiful salted caramel sauce. They are the perfect dessert. Yes, yes, the salted caramel isn’t the healthiest thing ever, but as this is a fruit based dessert it’s not the worst thing you can eat. Pears are packed with vitamin C, K and potassium.
Salted Caramel Baked Pears for One
If you are a solo chef you are probably thinking “Yes, but I’m cooking for myself, so this is lot of work for just one person”. It looks too good to be quick and easy right? Honestly, it’s not difficult. The pears themselves are super easy to make and you can prep the salted caramel sauce ahead of time and even freeze it to extend the shelf life (guidelines are below). For an extra treat add a good scoop of vanilla ice cream – yum!
While the recipe below gives enough salted caramel sauce for one portion – I’d STRONGLY recommend scaling it up and making more and freezing some to use later :).

How to cook baked pears
Baked pears are one of the easiest things to make ever. Honestly, they involve like 3 minutes of prep. And the pears themselves are super healthy. You could make them and serve with some natural yogurt instead of the caramel sauce for a low fat healthy dessert.
I like to bake my pears whole which takes around 30 minutes in a hot oven. You can alternatively slice them in half lengthways which will reduce the cooking time to around 15 minutes.
There’s no need to peel them. Simply remove the seeds. If you are baking them whole then cut a slice from the bottom (which will also help them stand upright) and use an apple corer or knife to remove the seeds. If you are cutting them in half then use a melon baller to remove the seeds.
Can these salted caramel baked pears be frozen?
Yes and no. When you are freezing pears you should use sugar or syrup to help preserve them – and to do so you need to either slice or peel the pears so whatever you use covers the flesh. So it depends if you are happy to bake them sliced rather than whole.
I wouldn’t recommend freezing them after cooking either as the texture will suffer. Therefore, unless you have a load of pears you want to extend the life of, just cook them from fresh. Pears will last a while anyway, when stored in a cool place.
You can freeze the caramel sauce however. Simply defrost for a few hours before serving, or use a microwave in short bursts to speed things up. Also, make sure you freeze them in a freezer proof container rather than a plastic jar.
So, overall, I’d recommend freezing the caramel sauce so you have it ready and on hand when the mood takes you. Then simply pop a fresh pear in the oven when you want to eat. Since most of the prep work goes into the sauce then this option gives you the freshest dessert, while still reducing 75% of the preparation.
Tips for making the salted caramel sauce
Salted caramel sauce is honestly easy once you get the hang of it, but it took me a few goes before I got it right the first time I made it. Seriously, I’m talking four or give goes. Hopefully these tips will help you get this right first time.
There are a lot of recipes out there that will tell you to ‘learn how to smell when it’s done’. Honestly, that’s not the information you want if you’ve never made this before. There are also some ‘cheat’ recipes that will have you cook the butter and sugar together (eliminating the worry of the sugar burning). The issue with this method is that, while it kind of works, I find that you’ll end up with a pasty pale and grainy sauce because you don’t caramalise the butter properly.
Here are my top tips:
- Watch it like a hawk & don’t let it burn
There is a very, very, very fine line between done and burnt when you are making a caramel sauce. Most recipes will tell you to turn the heat up when the sugar starts to melt. I find that keeping it on a constant medium low heat gives you a lot more control.
- Use white sugar
If you, like me, have pans which are black or dark inside then use a light coloured sugar. This makes it a little bit easier to see the colour change when you use white sugar compared with dark.
- Be ready for the frothing
Once you add the butter it will start to bubble and froth – this is normal. Expect it and be careful at this stage. Make sure you are using a big enough saucepan that it won’t spill over.
- Don’t panic if the butter separates – you can fix it
If the butter separates after adding it to the pan (you start to see a watery, oily layer on top of the mixture) then place the pan over a low heat and whisk really well – it should come back together and then you can add the cream.
- How long can you store the salted caramel sauce?
Keep the sauce in a sealed jar in the fridge. If you’ve used UHT cream then you can actually keep it for 3-4 weeks. However if you used fresh cream then I would go by the use by date on the carton and no more than a week. You can freeze the sauce for up to 3 months.
- Reheating the sauce
You can use a microwave (on short bursts and checking inbetween) to reheat the sauce if it has thickened too much (or if you just want a warm sauce to drizzle).
Products that work well for this recipe
Small Glass Airtight Jars
Set of 2 Small Sauce Boats / Jugs

Play Your Way Ice Cream Maker
Salted Caramel Baked Pears
Course: DessertCuisine: FruitDifficulty: Medium1
servings15
minutes30
minutes375
kcalA simple but beautiful dessert – tender freshly baked pears drizzled with salted sweet caramel sauce. Absolutely irresistible!
Ingredients
1 medium pear
25g sugar
12g butter, plus a little for basting
15ml (1 tbsp) double cream
large pinch salt (add more to taste if required)
Directions
- Preheat the oven to 200C / 400F
- Cut a small slice from the base of the pear – just enough so it will stand upright properly. Use an apple corer or small knife to cut into the underside and remove the seeds. Brush the pear with a little butter and add to the oven. Cook for 30 minutes.
- Make the caramel sauce. I’ve added some tips above which are definitely worth reading first if this is your first time making caramel. First add the sugar to a small saucepan over a medium heat. The pan should be small enough that your sugar covers the entire base of the pan (with up to a few cm thickness), but still will leave a good few inches above the sugar.
- Melt the sugar slowly. Do not step away, do not make a cup of tea, do not try and get a head start on the washing up. Once the sugar starts to melt then stir, stir, stir. Do not let it burn. Once it has reached a golden amber colour then remove from the heat.
- Stir the butter into the sugar – it will froth and bubble. This is why it’s important to use a pan that is large enough that it won’t bubble or flick out as you stir it. Keep stirring until it’s mixed well.
- Add the cream to the pan and stir everything together until fully combined and smooth.
- Serve with the salted caramel drizzled over the pear – absolute bliss!


I made this with my sister and it was a delicious, sweet (semi-healthy : ) snack. Carmelizing sugar is tricky for me, but this recipe was really simple to whip up and all of the tips prevented me from making the mistakes I’ve made in the past.
Hi Rachael, so happy to hear that it was a success for you 🙂 I’m glad the tips helped xx
The very worst thing about this recipe is….. I cannot email it !
I’m currently travelling and so had wanted to make Salted Caramel Pear dessert when home
Sigh
Naine
Hi Naine, Thanks for your comment – definitely a function I should think about adding! In the meantime you could click the print button and then ‘save as’ and store it as a PDF – which you could also attach to an email? Thanks 🙂 Caroline