*This post may contain affiliate links. Read my disclaimer here. While we may use affiliate links, we would never allow this to influence product listings or recommendations.
These mini chocolate tarts are the perfect guilty pleasure. Plus, you can dress them up so they look super fancy – great for impressing guests (or a little self-indulgence!) Made with dark chocolate they are rich, soft and delicious!
What are they?
These mini chocolate tarts (or should that be tartlets?) are a great dessert, made especially for all the chocolate lovers out there! A tart is a general term for a pie or dessert that has a layer of pastry filled with a sweet or savoury filling. Tarts are typically served without a lid.
These tarts actually use a biscuit base rather than pastry (so may not be traditional in every sense of the word). They are filled with a rich chocolate and cream filling.
Are they difficult to make?
These tarts are not difficult to make, as long as you don’t rush the process and follow a few simple rules
Tips
- When you come to melt the chocolate and other ingredients use a double boiler (a bowl placed over a pan of hot water). You want it to heat just enough to melt the chocolate, but not start to burn. Since this recipe uses butter you will find that the mixture can separate if it does get too hot, and you’ll end up with an oily layer on top. To prevent this I recommend heating a pan filled with around 1/3 water (never let the bottom of the bowl touch the water). When it just reaches a simmer then remove it from the heat and leave it for a couple of minutes before placing the bowl with the chocolate on top.
- Make sure you leave them in the fridge for as long as possible before serving – so plan ahead. While 2 hours should suffice, overnight is better.
- Use full-fat creme fraiche which will help the mixture to set to a firmer consistency.
- You can make different variations of this pie – try adding a shot of espresso or some orange juice and zest.

How long do they keep?
These mini chocolate tarts will keep for 3-4 days in the fridge. Cover them (being careful not to squash them) when storing and make sure that you don’t keep the mixture longer than the expiry date of the cream or creme fraiche.
You can also freeze them for up to 3 months. Store them laid flat in a sealable container. Carefully layer some foil over the top before freezing to help prevent freezer burn.
How can I decorate them?
There are a multitude of ways you can primp up these tarts and add extra flavour and visual appeal:
- Fresh whipped cream – Spoon into the middle and grate over some chocolate shavings.
- Chocolate curls – melt 30g/1oz chocolate and 1 tsp of butter together in a microwave in 15-second increments. Spread over a baking tray and freeze for 4-5 minutes until firm. Use a metal spatula to scrape the chocolate into curls.
- Fruit – berries work particularly well. I recommend blueberries, raspberries, blackberries and strawberries. Use a variety and get artistic! You may find it easier to lightly press the berries into the chocolate mixture before it’s fully set to keep them in place.
- Icing sugar – lightly dusted over the top.
- Fresh mint leaves.
Ingredients
You’ll need a few simple ingredients for this recipe. For the full list with measurements jump to the printable recipe card.

For the base:
- Dark chocolate
- Unsalted butter
- Digestive biscuits
For the filling:
- Dark chocolate
- Unsalted butter
- Whipping cream
- Full fat creme fraiche – using full fat will help it to set
Equipment:
4 inch fluted mini tart/quiche tins with removable base
How to make it
For detailed steps jump to the printable recipe card.
- Make the base by melting the butter and chocolate in a bowl over a small pan of hot water.
- Blitz the biscuits in a blender and mix with the butter and chocolate. Press the biscuit mixture into tins.
- Make the filling by melting the chocolate in a bowl over a hot pan of simmering water (be careful and don’t overdo this step – heat until just melted only).
- Allow the chocolate to cool for a minute and add the cream and butter and mix. When the mixture has cooled spoon in the cream fraiche and mix together.
- Spoon the mixture into the tart tins over the biscuit base and spread out. Cool for at least 2 hours or ideally overnight.

If you are looking for more great chocolate dessert recipes then check out:
- Individual no-bake chocolate cheesecakes
- Chocolate meringue nests
- Chocolate chip banana cookies
- Chocolate orange mousse
- Chocolate fondant mug cake (with peanut butter!)
Products that work well for this recipe:

6 Non-Stick Removable Bottom Mini Tart Tins
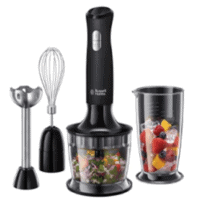
Russell Hobbs 3-in-1 Blender
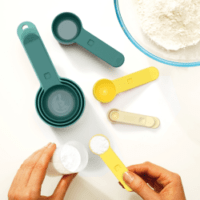
Nest Measuring Cup/Spoon Set

Mini Chocolate Tarts
- Total Time: 2 hours 20 minutes
- Yield: 4 1x
Description
These mini chocolate tarts are super-rich and indulgent and perfect for impressing guests or a loved one. They will keep an extra couple of days in the fridge so why not make an extra portion or two?
The default recipe makes 4 mini-tarts.
Ingredients
For the base:
- 25g / 0.9oz dark chocolate
- 35g / 1.25oz unsalted butter
- 6 digestive biscuits
For the filling:
- 175g / 6.2oz dark chocolate
- 25g / 0.9oz butter
- 125ml / 1/2 cup whipping cream
- 100g / 3.5oz full-fat creme fraiche
To decorate (pick all that appeal!):
- berries such as blackberries, blueberries or raspberries
- sifted icing sugar
- whipped cream
- chocolate shavings
- fresh mint leaves
Equipment
4inch fluted mini tart/quiche tins with removable base
Instructions
- First, make the base. Place the butter and chocolate in a metal or glass bowl and place over a small pan of hot water (ideally bring a pan 1/3 full with water to a simmer then remove from the heat for a minute or so before placing the bowl over). Gently melt and mix together.
- Next, blitz the biscuits in a blender until you have a crumb texture. Tip into the butter and chocolate and mix everything together.
- Portion the biscuit crumb mixture into the tins. Press down firmly with a small spoon, making sure you press the mixture so it fills into all the edges.
- Next, make the filling. Melt the chocolate in another bowl over the hot water again. When fully melted remove the bowl from above the hot water and add the cream and butter and mix together. It is really important to make sure you do this step very slowly as if the butter gets too hot it will split, and you’ll have a dark, blobby and oily mess on your hands (and I’m sure you don’t want to waste chocolate that way!)
- Make sure the mixture is cool and then spoon in the creme fraiche and mix everything together.
- Spoon the mixture over the biscuit base in the tins and spread it out evenly with the back of a spoon. Place in the fridge to cool. It will need at least 2 hours but leaving it overnight is a good idea.
- Carefully remove the mini tarts from the tins and plate when ready to serve. Top with your choice of garnish.
Notes
- I wasn’t joking when I said be careful with the chocolate melting stages – particularly for the filling. I’ve wasted good chocolate this way
- For best results make sure you use full-fat creme fraiche as this will help it set better (although I have tested it with half fat and it does work, but the chocolate filling mixture will be a lot softer).
- Prep Time: 20 minutes
- Cook Time: 2 hours
- Category: Dessert
- Method: No Bake
- Cuisine: British
Nutrition
- Serving Size: 1
- Calories: 695
- Fat: 60g
- Carbohydrates: 29g
- Protein: 6.5g
Keywords: chocolate tart, dessert, indulgent, comfort food, sweet